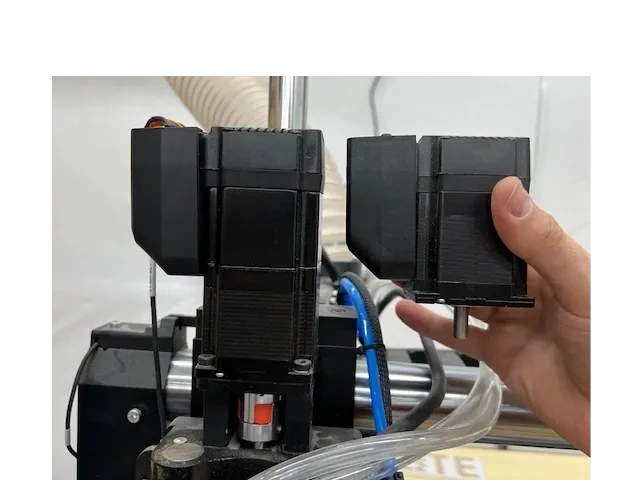
Very soon after reception of my Foreman, I powered the machine off and the spindle dropped like a rock, jamming the installed tool into the wasteboard. Ouch! This sucks, and I'm sure I cussed a little. I quickly made it a habit to remove tools before powering off, which was a hassle.
There was discussion on the forums about replacing the Z ball screw with one with a more shallow slope. I contacted Onefinity support about this as a possibility. They recommended against it as it would not be supported. Instead, they suggested I just wedge a block of wood under the spindle before cutting power. Better, but clunky.
Then DigiGraphics came out with the Zee Keeper, which did the job, but still wasn't the right solution.
Finally, Onefinity released their Z-20 Braking Motor. This is the right solution and an elegant one. This is the solution you need.

The braking motor is much larger than the non-braking motor.
Installation
The installation is very straightforward. Onefnity has a good video on YouTube that covers the installation. Again, I won't recreate the wheel here, but there's one addition and one change I'd suggest.

First, the addition. Some of the motors that Onefinity initially shipped had resistors in them, as mine did. The installation video doesn't mention this resistor and if it should be left in or removed when swapping the motors. Perhaps because it doesn't matter that much. That said, it's not harmful to leave it in, and it slightly lowers the demand on the power supply when left in. I left mine in, which also made the installation process more simple, as I didn't have to change the wiring at all. I'd recommend you do the same.

Now, the change. Onefinity suggests removing your spindle in order to access the set screw and bolt that hold the lower half of the coupler on. Doing so would introduce a change to your spindle height, requiring the re-calibration of your 3D touch problem, tool setter, ATC, etc. That's an unwanted hassle, so I'd recommend leaving the spindle in place during the motor swap.
Both the set screw and the bolt are accessible with the spindle still mounted. Just carefully jog it down to as a low position where both are oriented toward the front and accessible with a long Allen key. Make sure you support the spindle so it doesn't drop.
Once you're done, you can enjoy the benefit of a spindle that won't suddenly drop when power is lost or E-stop is pressed. I wish they had shipped this way. Props to Onefinity though, for listening to their customers and adding this as an option.
